
BruxZir Anterior Crown Prep: Complete Clinical Guide
Crafting a lifelike, resilient restoration at the front of the mouth demands absolute precision. While traditional porcelain-fused-to-metal crowns once dominated the industry, monolithic zirconia now leads modern dentistry. However, succeeding with a bruxzir anterior crown prep requires a complete departure from older clinical habits.
Dentists must carefully manage the balance between conserving natural enamel and meeting the strict minimum thickness standards of advanced ceramics. Modern high-translucency zirconia offers incredible strength, but it behaves poorly if structural guidelines are ignored. This comprehensive guide outlines the exact clinical steps needed to achieve predictable, highly aesthetic outcomes in the anterior zone.
What Are the Core Principles of a Successful Preparation?
Respecting the physical properties of monolithic zirconia is your first clinical priority. This material boasts massive flexural strength, but sharp internal line angles easily compromise its structural integrity. A flawlessly smooth preparation distributes occlusal forces evenly, preventing the micro-fractures that typically lead to catastrophic failure.
Furthermore, anterior restorations require a hyper-focus on restorative space. You must provide your dental laboratory with enough room to build surface texture, anatomical nuances, and incisal gradients. Insufficient reduction forces the technician to create bulky, opaque restorations that fail to blend seamlessly with the patient’s natural smile.
How To Execute Proper Incisal edge reduction for zirconia crown Procedures?
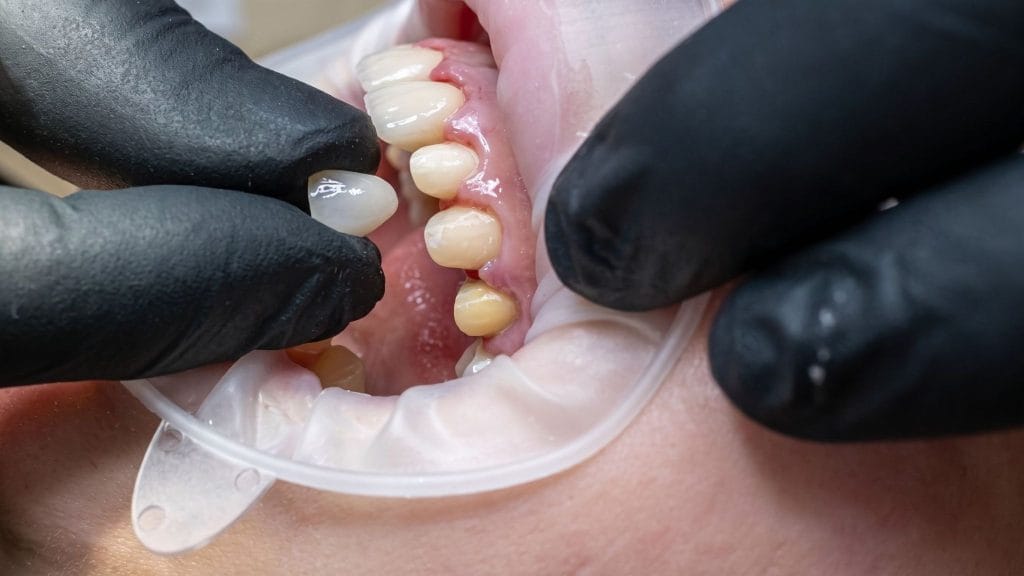
The incisal third heavily dictates the final visual success of the restoration. Precise Incisal edge reduction for zirconia crown delivery gives the milling machine and the ceramist the canvas they need to mimic natural translucency. Without this dedicated space, the final unit will appear flat and lifeless.
What Depth Ensures Optimal Translucency?
Aim for a minimum reduction of 1.25 mm to 1.5 mm at the incisal edge. This clearance provides sufficient room for internal characterizing stains or the seamless transition of multi-layered zirconia blocks. Always utilize a depth-cutting bur to establish reliable visual guidelines before removing the bulk of the tooth structure.
Never flatten the incisal edge completely horizontally. You must respect the natural angulation of the tooth by carrying the incisal reduction slightly toward the lingual aspect. This technique preserves the appropriate anatomical framework for the final ceramic layer.
What Defines the Perfect BruxZir crown axial wall reduction?
The way you shape the axial walls directly influences the long-term periodontal health of your patient. An accurate BruxZir crown axial wall reduction ensures the lab can design a crown with a flat, natural emergence profile. Insufficient reduction inevitably leads to over-contoured margins that act as plaque traps and irritate gingival tissues.
You should target a uniform reduction of 0.8 mm to 1.0 mm across the axial surfaces. This specific depth gives the final restoration optimal fracture toughness while allowing the ceramic to sit flush with the natural root structure. Be sure to maintain a consistent taper of 6 to 8 degrees to guarantee adequate retention and resistance form.
Why Should You Use a Two-Plane Technique?
Human teeth possess a distinct facial curvature that changes from the gingival margin to the incisal edge. Your bruxzir anterior crown prep must incorporate a two-plane reduction to accommodate this natural sweep. Reduce the gingival half parallel to your path of insertion, and angle the incisal half lingually.
Ignoring this two-plane requirement usually results in either a bulky facial contour or dangerously thin ceramic near the incisal edge. Always evaluate your preparation from a strict profile view to confirm the facial reduction mimics the original anatomy.
When Is Interproximal reduction for anterior crown Necessary?
Successfully opening the contacts between anterior teeth requires a steady hand to protect neighboring enamel. Executing an accurate Interproximal reduction for anterior crown preparation gives your impression material or digital scanner the physical clearance needed to capture the margins perfectly. Tight contacts obscure the finish line and force the laboratory to guess the margin placement.
Start by sliding a very thin needle diamond through the contact, intentionally leaving a paper-thin layer of enamel on the adjacent tooth as a protective shield. Once the contact is fully broken, switch to your standard chamfer bur to finalize the interproximal margin.
You need to establish at least 0.6 mm of separation between the preparation margin and the adjacent tooth. This gap allows the technician to design appropriate interproximal embrasures, which are absolutely critical for maintaining the health of the interdental papilla.
Deep Chamfer vs. Feather edge margin BruxZir prep: Which Is Superior?
Your chosen margin geometry dictates the seating accuracy, marginal seal, and soft tissue response. Dentists frequently debate the merits of different finishing lines when working with high-strength ceramics. When evaluating a deep chamfer against a Feather edge margin BruxZir prep, aesthetics must drive your decision.
A prominent, rounded chamfer measuring between 0.6 mm and 0.8 mm remains the gold standard for anterior cases. This geometry creates a highly visible finish line that intraoral scanners easily interpret. It also ensures the ceramic maintains enough cervical thickness to hide darkened underlying dentin.
Conversely, you should avoid feather edge margins in the aesthetic zone. While technically millable, feather edges force the laboratory to thin the zirconia aggressively, which often leads to poor masking ability and over-bulked cervical profiles. Stick to a clean chamfer for superior aesthetic control.
How Do You Optimize Rotary instrument selection for zirconia prep?
The tools you select directly determine the quality and smoothness of the underlying dentin. Strategic Rotary instrument selection for zirconia prep minimizes damaging heat generation and eliminates internal stress points. Rough, jagged dentin creates friction that prevents the rigid crown from seating entirely.
Begin your gross reduction using a coarse round-end taper diamond bur. The rounded tip automatically establishes a beautiful chamfer margin while you reduce the axial walls. Transition to a football-shaped diamond bur to hollow out the lingual concavity seamlessly.
Why Is Preparation Polishing Non-Negotiable?
Once you finish the primary reduction, you must refine the entire tooth with fine-grit finishing diamonds. Remove any unsupported enamel lips, smooth out sharp line angles, and eliminate J-margins. A highly polished bruxzir anterior crown prep guarantees a frictionless seating process and drastically improves digital scan accuracy.
What Steps Ensure a Flawless BruxZir crown seating and try-in protocol?
Successfully delivering the restoration demands strict handling procedures to preserve the bond strength and the ceramic matrix. A disciplined BruxZir crown seating and try-in protocol eliminates contamination and prevents iatrogenic fractures. Because monolithic zirconia cannot flex, you must never force a binding crown onto the preparation.
Start by verifying the interproximal contacts with articulating film, making minor adjustments using a dedicated zirconia polishing wheel. Once the unit seats completely, check the marginal integrity and confirm the occlusion. Always perform your occlusal adjustments before the final cementation to prevent inducing micro-cracks in the set ceramic.
How Should You Handle Decontamination?
The moment a crown enters the mouth for a try-in, salivary phosphates aggressively bind to the internal zirconia surface. This contamination permanently blocks resin primers from functioning. You must apply a specialized alkaline cleaning agent (like Ivoclean) to the internal surface for 20 seconds, rinse it heavily, and dry it completely.
After decontamination, coat the intaglio surface with a primer containing 10-MDP to establish a chemical bond. You can then cement the bruxzir anterior crown prep utilizing your preferred dual-cure or self-adhesive resin cement. Apply steady pressure during the curing phase and remove excess cement promptly.
Why Is Soft Tissue Management Vital for Margin Capture?
Capturing a flawless impression relies entirely on keeping the gingival tissue completely retracted and dry. Whether scanning digitally or using traditional polyvinyl siloxane, blood and crevicular fluid will obscure the margin. An obscured finish line inevitably results in a poor-fitting final restoration.
Utilize a double-cord packing technique to achieve maximum isolation. Pack a thin size-00 cord at the base of the sulcus, followed by a larger cord to deflect the tissue laterally. Leave the cords in place for roughly five minutes to achieve total hemostasis before removing the top cord for the final scan.
How Do Digital Scans Alter Your Preparation Strategy?
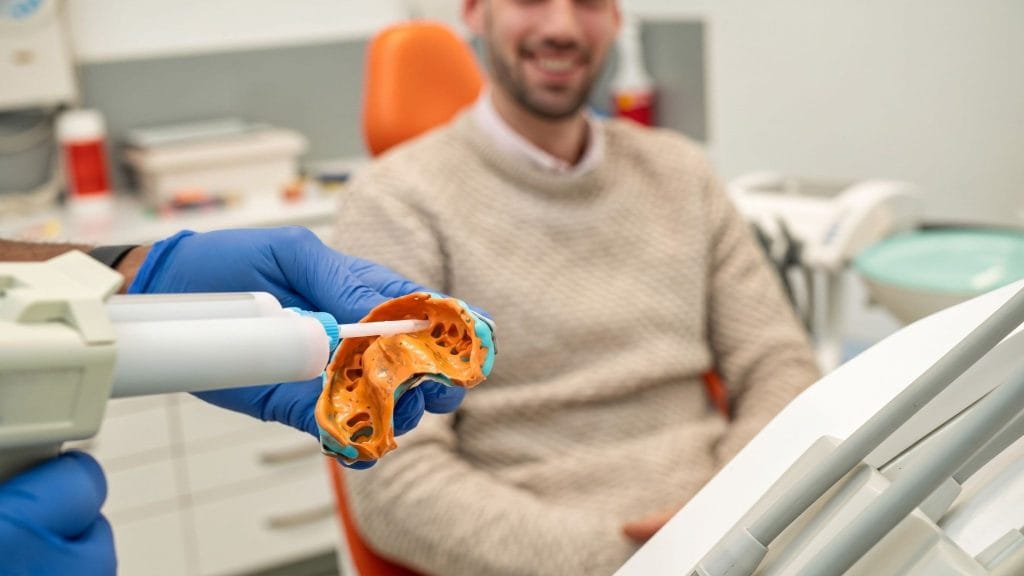
Intraoral scanners require smooth surfaces and highly visible margins to generate an accurate mesh. When designing a bruxzir anterior crown prep for a digital workflow, avoid sharp undercuts and deep subgingival finish lines. Scanners rely on light projection, and deep sulcular blood easily blocks the camera’s view.
Whenever clinical conditions allow, keep your margins equigingival or at a maximum of 0.5 mm subgingival. Review the digital rendering carefully on your monitor before dismissing the patient. Ensure the margin is distinctly visible continuously around the entire preparation.
Why Should Dental Practices Partner With Zirconia Express for Digital Cases?
Achieving outstanding anterior aesthetics requires more than clinical skill; it requires an elite dental laboratory. Located in North Carolina, Zirconia Express serves as a premier B2B partner for dental clinics, prosthodontists, and implant specialists across the nation.
Selecting the right laboratory instantly reduces chairside adjustment time and elevates patient satisfaction. Zirconia Express utilizes an advanced AI-driven design system for all digital dental cases, ensuring unmatched precision on every unit. Clinicians can choose from three distinct anatomical shape options, granting complete control over the emergence profile and final appearance.
Consistency and trust form the foundation of any great practice. Zirconia Express delivers premium high-strength zirconia crowns and bridges, all backed by an industry-leading warranty of up to 5 years. With reliable turnarounds, natural aesthetics, and seamless digital workflow integration, you can confidently handle the most demanding aesthetic challenges. Reach out to Zirconia Express today to elevate your restorative workflow.
Conclusion
Delivering predictable, lifelike results in the aesthetic zone requires strict adherence to modern preparation guidelines. A flawless bruxzir anterior crown prep relies entirely on smooth transitions, uniform material space, and an unmistakable chamfer margin. By removing the right amount of tooth structure, you give your ceramist the space needed to craft a beautiful, natural-looking restoration.
Every clinical phase, from executing the initial depth cuts to decontaminating the final crown, impacts the long-term survival of the unit. Perfect your rotary technique, manage the gingival tissues carefully, and follow strict cementation protocols. Partnering with a premium digital lab ensures these clinical efforts translate directly into durable, breathtaking smiles for your patients.
FAQ’s
What is the minimum thickness for a bruxzir anterior crown prep?
The minimum thickness required for a bruxzir anterior crown prep is generally 0.8 mm on the facial and lingual surfaces, with 1.25 mm of clearance at the incisal edge. Maintaining these minimums provides the material with enough flexural strength to withstand anterior guidance while allowing room for aesthetic layering or shading.
Can I use a feather edge margin for a bruxzir anterior crown prep?
While monolithic zirconia can technically be milled to a feather edge, it is not recommended for anterior restorations. A deep chamfer of 0.6 mm to 0.8 mm provides a better emergence profile, prevents bulky cervical margins, and gives digital scanners a clearer finish line to read.
How do I prevent my bruxzir anterior crown prep from looking opaque?
Opacity in anterior zirconia is usually caused by under-reduction. If you do not provide at least 1.25 mm of incisal clearance, the lab cannot build in the natural translucency gradient. A proper two-plane facial reduction is also necessary to prevent the lab from having to thin the material excessively.
What is the best way to clean a bruxzir anterior crown prep before cementation?
After trying the crown in the mouth, saliva contaminates the internal surface and inhibits resin bonding. You must clean the internal surface with a zirconia-specific cleaning solution (like Ivoclean) for 20 seconds, rinse, and dry completely. Following decontamination, apply an MDP-containing primer before loading your cement.
Does a bruxzir anterior crown prep require a specific taper?
Yes, you should aim for an ideal taper of 6 to 8 degrees between opposing axial walls. This specific angulation provides excellent retention and resistance form while allowing the crown to seat smoothly without binding. Over-tapering the preparation will significantly decrease the retention of the final restoration.